
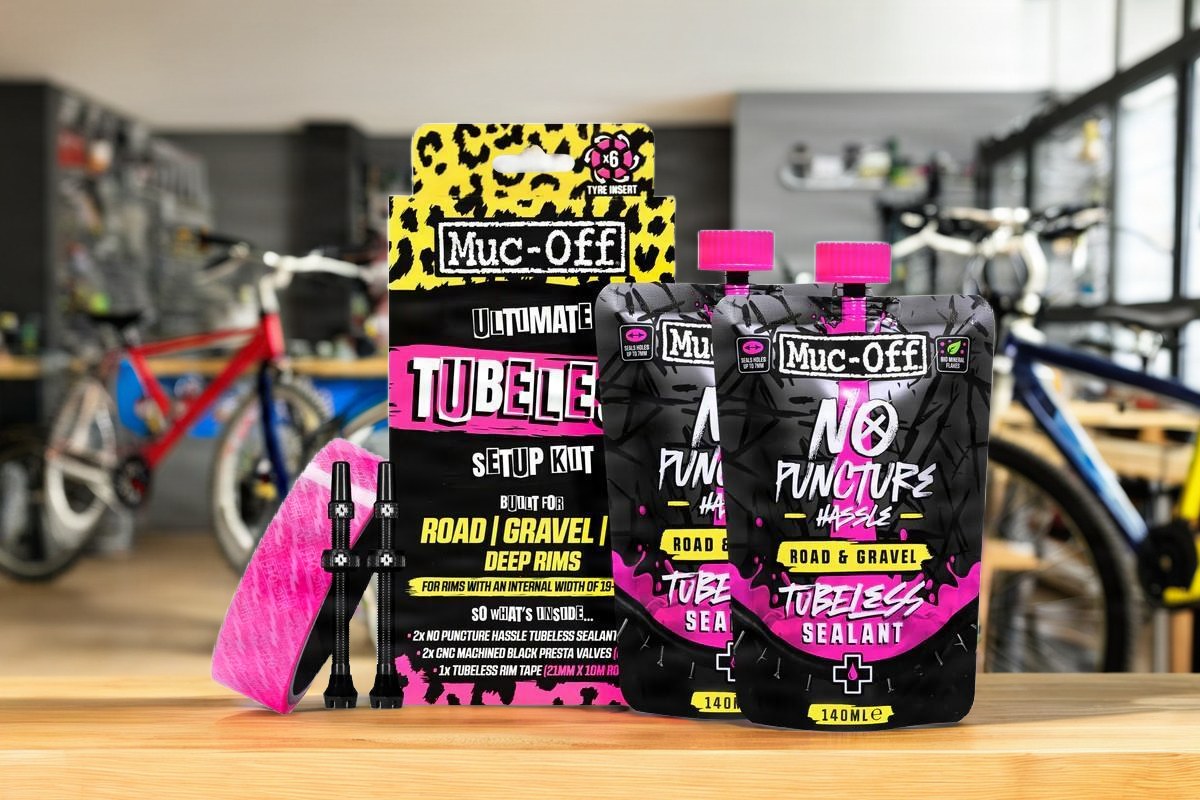
The tubeless is no longer just MTB professionals. Today it is easily mounted on the road and gravel, and for those who pedal so much it is almost always the most sensible choice: less punctures, lower pressures manageable in safety, different driving sensation. But to work well you need to understand what really needs, how you mount and, above all, how you keep it over time. Sealing liquid is not eternal: if you forget it, the system stops protecting you just when you need it.
What it takes to mount the tubeless
First rule: rim and tires must be tubeless compatible, or at least tubeless ready. Not all circles accept tubeless without modifications, and not all tires have the right structure to hold pressure without air chamber. If you have doubts about the compatibility of your circle, the easiest thing is to ask in the workshop before buying something: you lose less time so that you get back together twice.
- Cerchio tubeless ready with suitable channel
- Tubeless cover or tubeless ready compatible with use (road, gravel, MTB)
- Tubeless tape the correct width for your circle
- Tubeless valves with a base suitable for the hole in the circle
- Sealing liquid in sufficient quantity
- High pressure compressor or hand pump, better if with compression chamber
For those who want to start with everything they need in one shot, tubeless kits designed for bike type simplify a lot of life. A tubeless kit Muc-Off for XC and gravel contains tape, valves and liquid sized for that use, while the version designed for road, gravel and cyclocross has calibrated characteristics on higher pressures and different wheel volumes. Starting from the right kit for your discipline avoids buying wrong pieces or having to rebuff tape and valves separately.
How to mount the tubeless, step by step
- Unmount tire, air chamber and old tape, clean the circle channel well
- Apply the new tubeless tape, pulling it with constant tension and without folds, overlapping slightly to the complete round
- Make a precise hole in the tape at the valve hole and mount the tubeless valve, tightening the nut that long enough to keep it in place without deforming the gasket
- Mount the dry tire on one side, then pour the sealant liquid into the quantity indicated by the manufacturer of the tire or liquid itself
- Close the second side of the tire, centering the heel well
- Inflate with compressor or high pressure pump: the "boot" you feel is the heel that settles in place, is normal
- Turn the wheel in all directions to distribute the liquid, then make sure there are no leaks from the heel or valve
If the first inflates the tire does not hold air, it is not said to be your fault: sometimes you just need a more powerful compressor to trigger the heels in place. If after several attempts it continues to lose air from the hips or the channel, better have the assembly checked in the workshop before ruining tire or tape.
Every time you check and bump the liquid
The sealant liquid dries, point. How quickly depends on temperature, humidity, type of liquid and how much you use the bike. In summer, with dry heat, it evaporates faster; with damp climate lasts longer. As general indication, here is a table to adapt to your real conditions:
| Condition of use | Recommended control |
|---|---|
| Frequent use, hot weather | Every 4-6 weeks |
| Regular use, temperate climate | Every 2-3 months |
| Occasional use, bike stops often | Before each long or raced exit |
| After a sealed puncture | Control within a few days |
An easy way to check: if you shake the wheel and feel no more fluid moving, or if the tire loses pressure faster than usual in a night, it's time to bounce. A liquid thought on the road and gravel, like the No Puncture Hassle Muc-Off from 140 ml, is convenient for this very reason: the dosed package makes it easy to understand how much you are pouring and how much you have used over time.
What to bring in bag for drilling
The tubeless reduces the punctures but does not reset them. A hole too big, a cut on the side or a valve that loses can still leave you on foot. Here's what should not be missing:
- Chopstick kit (plug) to plug holes on the tread
- Mini pump or cartridge of CO2 with adapter
- A spare air chamber, for cases where the tubeless no longer holds
- Key or tool to disassemble and reassemble tubeless valve
- A little spare sealant liquid, useful if the level in the wheel is already low
Tubeless valves wear out or bend over time, especially if you often disassemble the wheel or use low-gentle pumps. Having a pair of tubeless replacement valves, such as those Muc-Off 60 mm black ones, avoids you from being stuck for a component that costs little but is easy to ruin.
When it's better to go to the workshop
The first tubeless assembly, if you have never done it, is worth showing once by the person who does it every day: you immediately understand where he is usually wrong and what tools they really need. It's the same if the tire doesn't keep pressure despite attempts, if you hear strange noises from the valve, or if the liquid comes out of the heel even after the bubbling. Better a check in the workshop than to continue to chase a loss that perhaps depends on a tape applied badly or a circle not perfectly compatible.
Frequently asked questions
Can the tubeless be mounted on any road wheel?
No, you need a tubeless ready circle and a compatible tire. On wheels do not think for tubeless the system does not hold pressure reliably, so it is better to check first the specs of the circle or ask for confirmation in the workshop.
How long does the sealant liquid last before it needs to be bottled up?
It depends on climate and use: with intense heat it can serve a control every 4-6 weeks, with regular use in temperate climate every 2-3 months can suffice. The practical check is to check if you still feel liquid moving by shaking the wheel.
Are tubeless valves all the same?
No, they change by the length of the stem and shape of the base, depending on the thickness of the circle and the type of tape used. Therefore it is useful to have a pair of replacement valves compatible with your wheel, so as not to get stuck if one is damaged.
More articles
A bike ride in Ticino: how to choose and prepare the route
An itinerary should be chosen based on depth, distance, difference in altitude and conditions of the day. Use this list to prepare an exit in Ticino without relying solely on a…
Read the article
Used bike: what information to check before purchase
To choose a used bike counts the individual specimen, not just the model name. Here is what information to look for in the card and what questions to ask the seller.
Read the article
Care of the e-bike: daily checks and workshop assistance
An e-bike requires attention both to the bicycle and to the instructions of its electrical system. It distinguishes the controls used by the interventions to be entrusted to the…
Read the article